Sections
A. Resume
B. Biography
C. Artist Statements
D. References
E. Letter of Interest
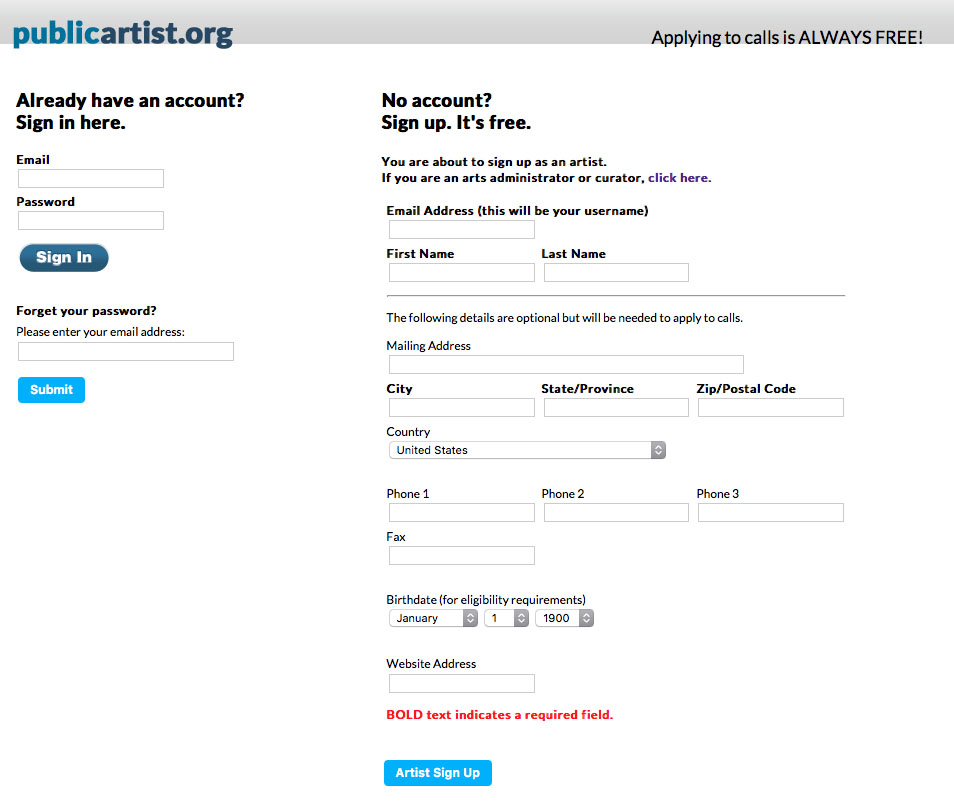
When you sign up as an artist, you will be asked for some basic personal and contact information. We will use this information in your user profile section of the website. Please be sure to use proper spelling, punctuation, and capitalization when filling out this form, as this information will be used in the Documents section of the website. You will be able to modify the information entered here in your User Profile.
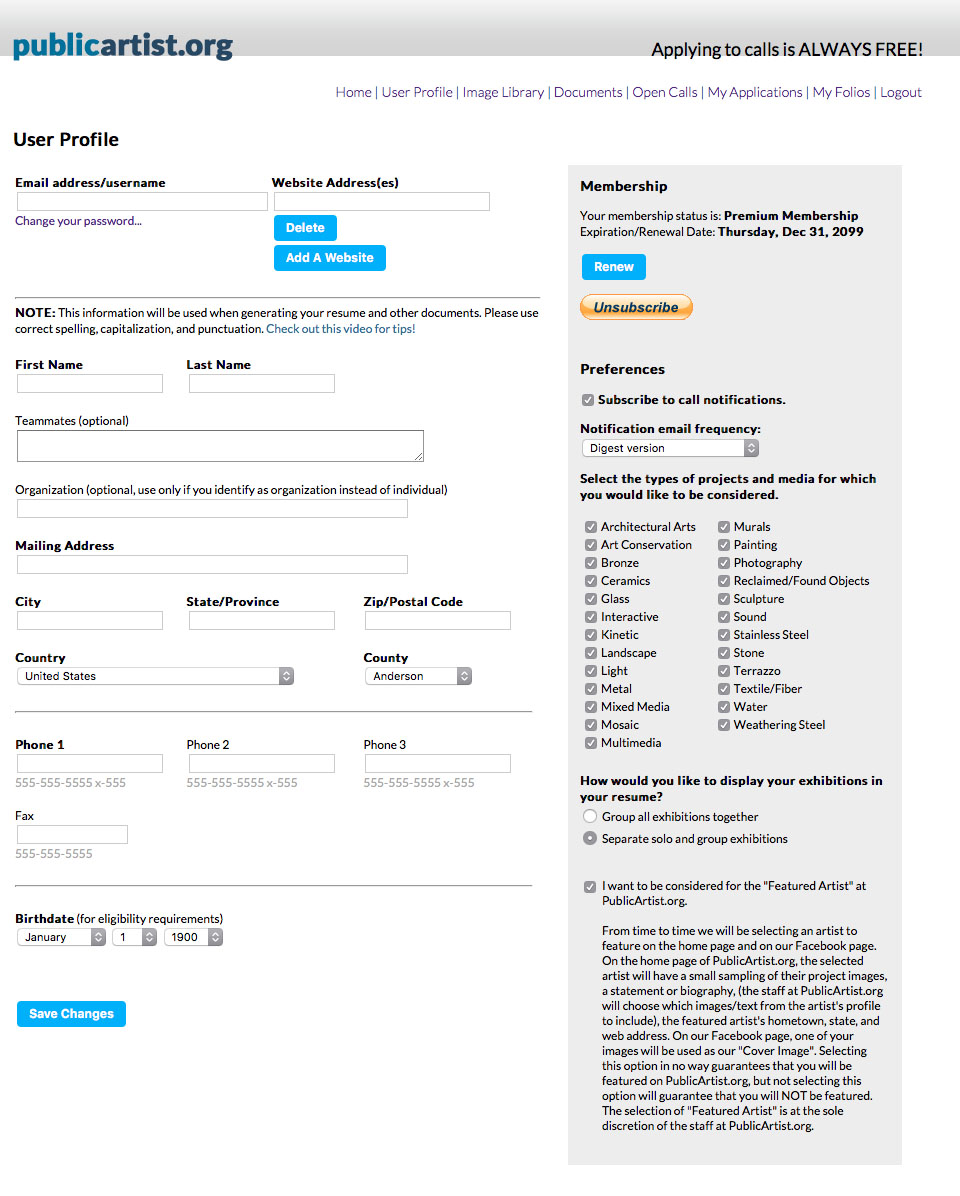
Your user profile is where your contact information, eligibility information, and certain site preferences are stored. If you would like to change your password, locate the link below your email address/username.

Please verify that all of the contact information is accurate. We use the "County" field on this page in order to verifiy your eligibility in calls with geographic restrictions. We use your birthdate to verify that you meet basic age requirements for calls.
On the right side of the screen there is a panel called "Preferences"
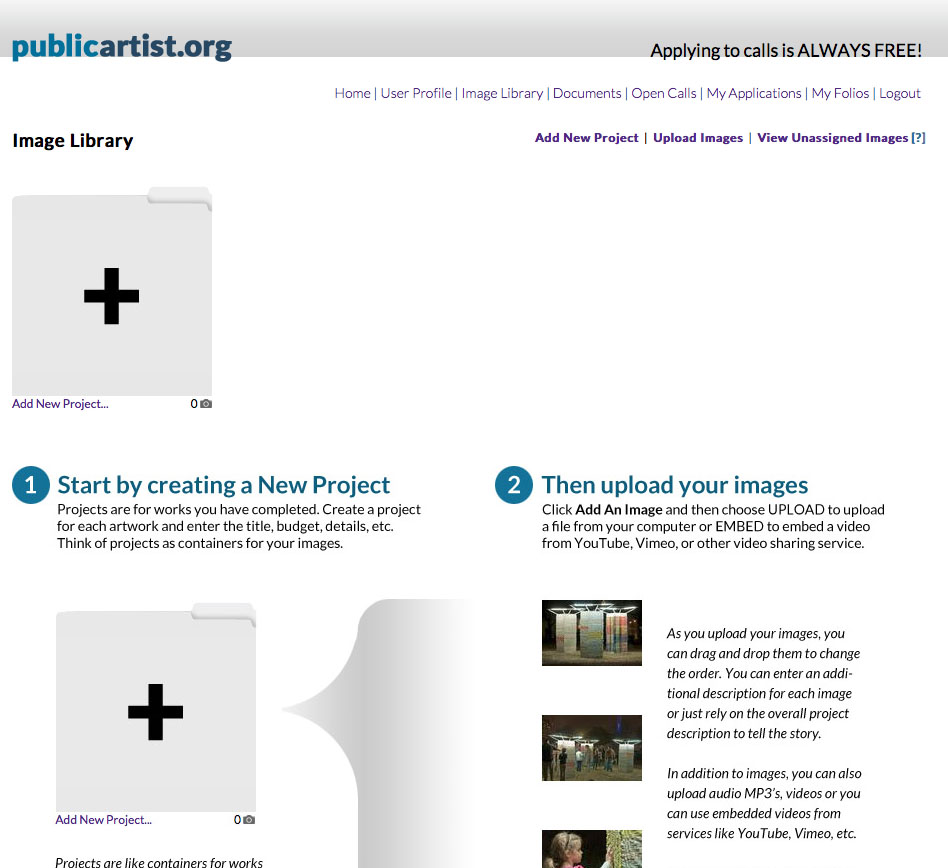
Your image library contains all of the photos and information for public art projects you have completed in the past. All of the information in this section is organized by project.
If this is your first time to the website or you have not yet added a project you will be asked to do so.
An Empty Image Library
Filling Out Project Information
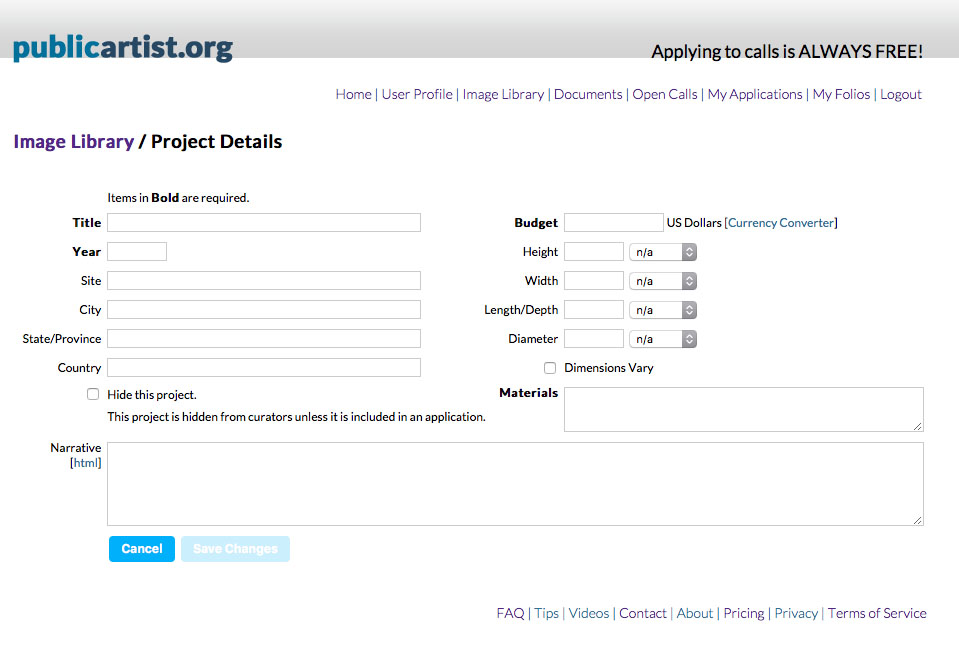
Once you have created at least one project you will be able to upload images.
Now that you have created a project, it's time to add some images. You should always upload high resolution versions of your images. The site will take care of sizing them appropriately for different applications. We recommend uploading photos that are at least 2000 pixels wide in the shortest dimension.
When you are ready to upload an image to an existing project, select "Edit Image Group" from the bottom of the project's panel on the Image Library page.
An Image Library with One Project with No Images
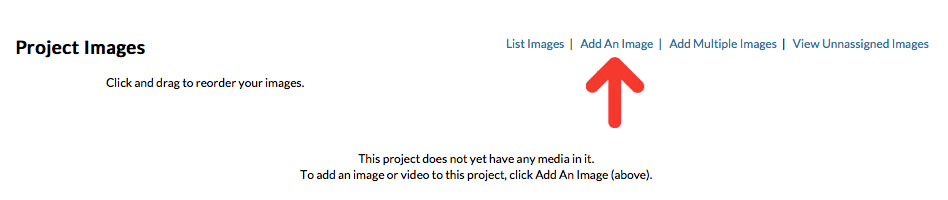
From this screen you will select "Add An Image".
Add An Image

Now, you can select the photo you want to add to this project. Click on "Choose File". Navigate to the image's location on your computer, select it, and press "Choose".
On this page you will also enter a description for this particular photograph, if you like. Some photos are self explanatory, but others, such as details, may require a little extra information.
Once you have selected your image and filled in the description if you want one, click on "Submit" and the image will be uploaded and added to the Image Group for your project.
An Empty Image Record
![]()
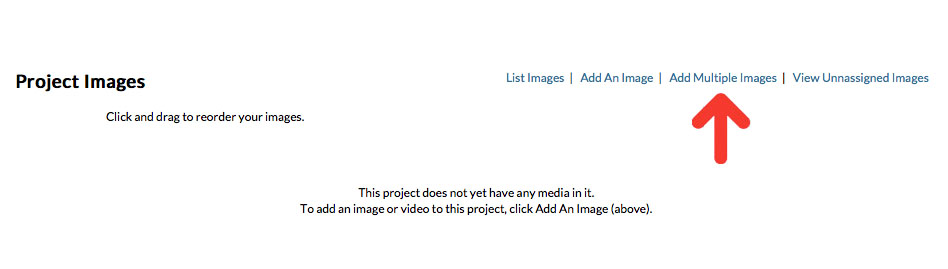
If you have several images for one of your projects, you may not want to upload each picture one at a time. That's ok; you can upload a group of images at once using the "Add Multiple Images" link from the Edit Image Group page.
Add Multiple Images
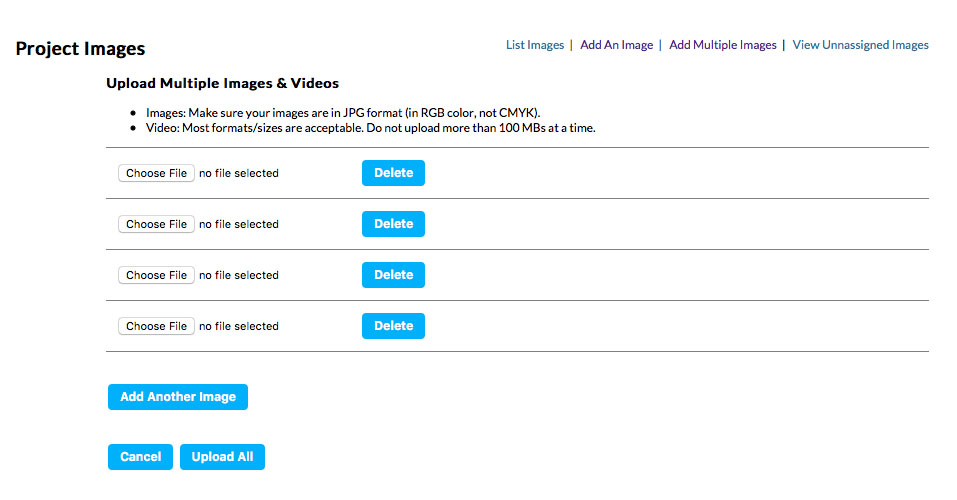
From this page you can select multiple files to upload to your project. Select "Choose File" at the top of the list. Navigate to the image's location on your computer, select it, and press "Choose". Repeat this process for the rest of the images you'd like to upload. If you need to upload more than 4 images, select "Add Another Image" and another record will be added to the bottom of the list. Once you have selected all of the images you'd like to upload to this project, select "Upload All".
Selecting Multiple Images to Upload to a Project
You're done with this project. Your Image Library should look something like this now.
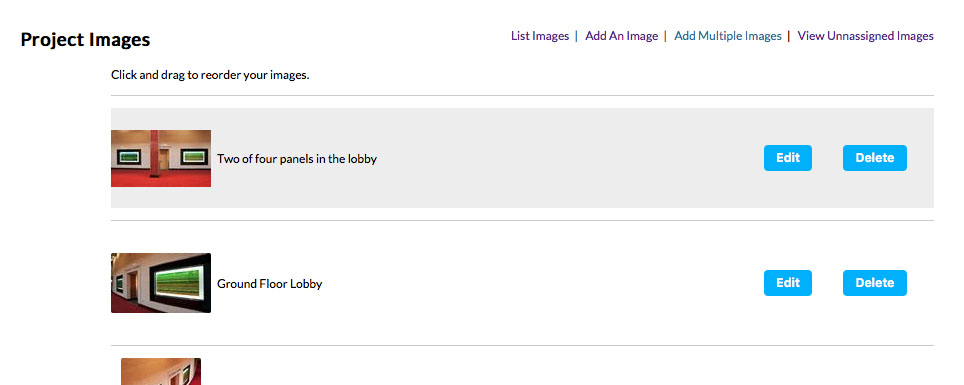
A Project with Images
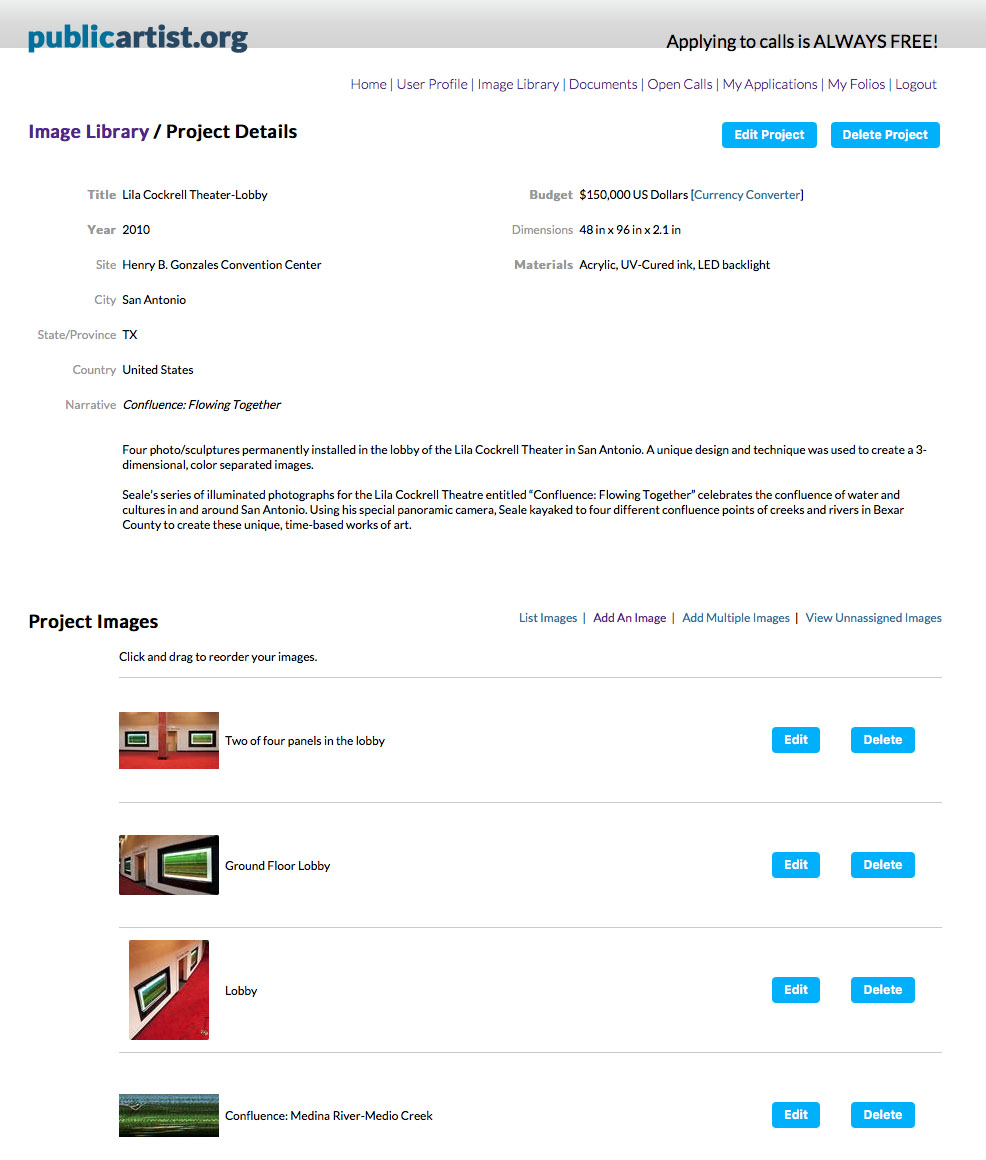
If you select the link below the image, in this case "10 more...", or the "Edit Image Group" link you can see all of the images which are assigned to this project, and the beginning of their descriptions. You can also reorder the images by dragging and dropping the rows.
A Complete Image Group
Once you've added a few projects, and uploaded some images, you may find that you'd like to upload a lot of images to your Image Library at once, but they don't all belong to the same project, or they will belong to project that you haven't entered into your Image Library yet. No problem. (By the way, we refer to these "loose" images as unassigned images.)
On the Image Library page, select "Upload Images".
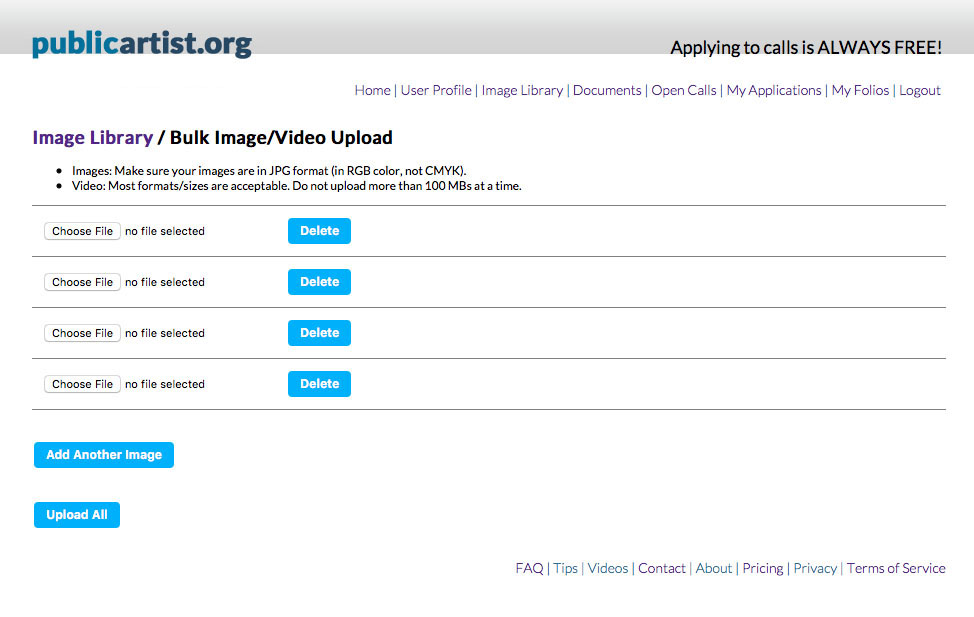
From this page you can select multiple files to upload as unassigned images. Select "Choose File" at the top of the list. Navigate to the image's location on your computer, select it, and press "Choose". Repeat this process for the rest of the images you'd like to upload. If you need to upload more than 4 images, select "Add Another Image" and another record will be added to the bottom of the list. Once you have selected all of the images you'd like to upload, click "Upload All". This process may take some time, be patient!
Selecting Images to Upload as Unassigned Images
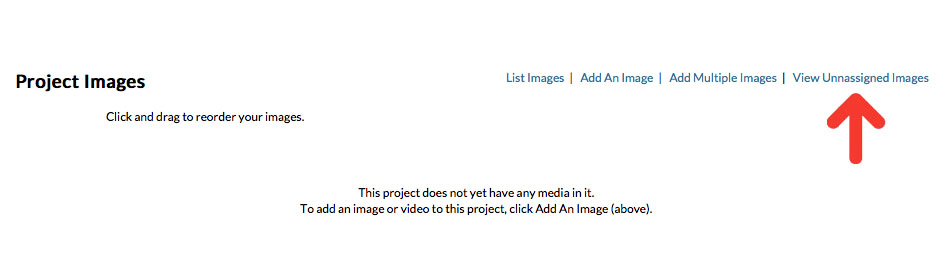
Once you have uploaded all of your images it's time to assign them to projects. You can do this from the Unassigned Images page. On the Image Library page, select "View Unassigned Images".
Viewing Unassigned Images
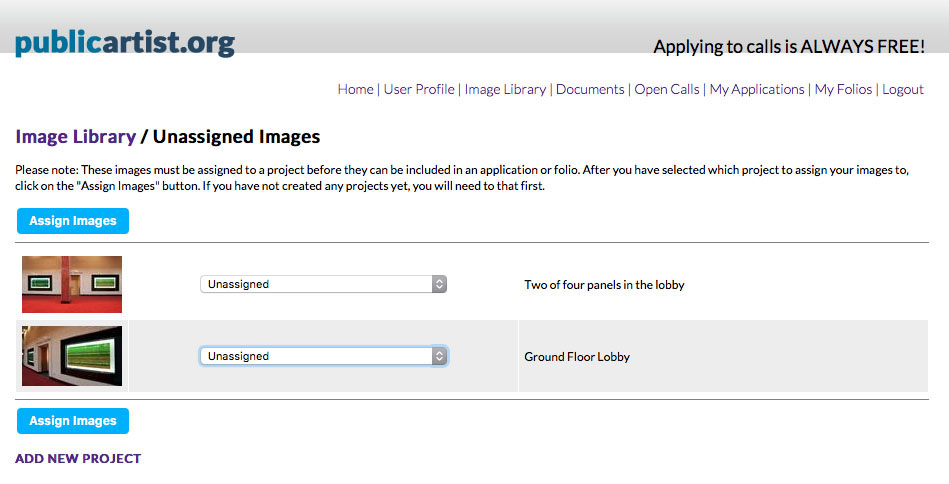
On this page you can see all of the "loose" images which you have not assigned to a project. (Images MUST be added to a project before you can use it for output in an application, folio, and before a curator can see them when browsing your profile.
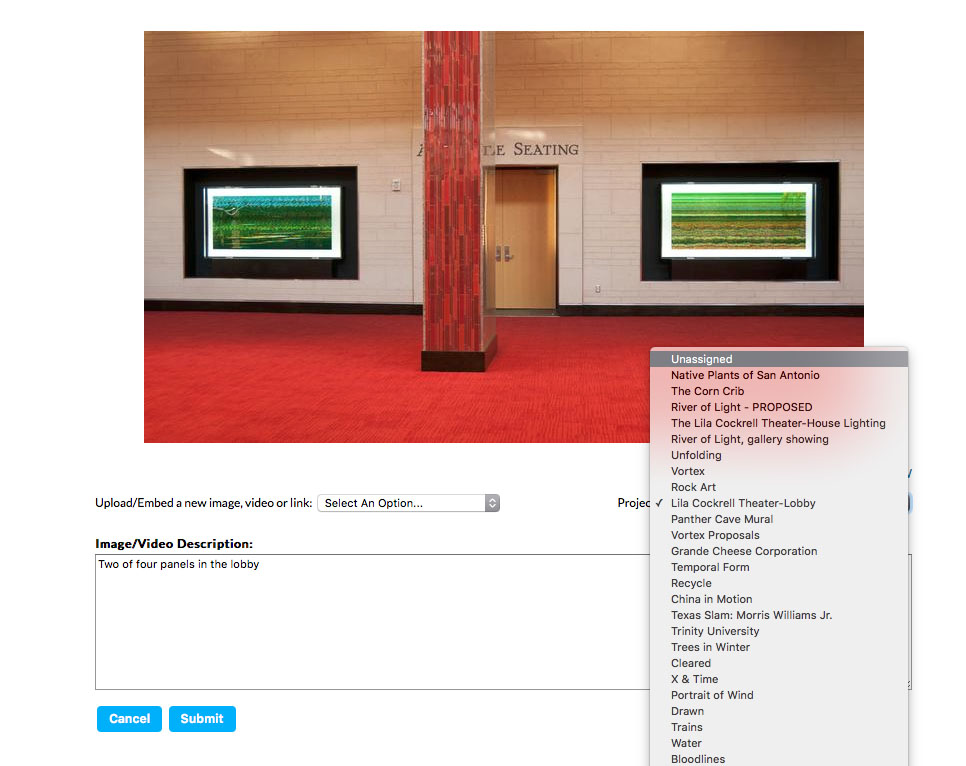
To assign an image to a project that is already in your Image Library, simply select the project from the drop down menu to the right of the image. You can do this for as many of the images on the page as you like, and all of them will be assigned accordingly once you click on the "Assign Images" button.
The Unassigned Images Page
If you've made a mistake along the way or something comes up and you need to remove an image from a project WITHOUT removing it from your Image Library, you can unassign the image; it will show up on your Unassigned Images page once the process is complete.
To unassign an image, on the Image Library page, select "Edit Image Group" on the project panel for the project that the image is currently assigned to.
Find the image that needs to be unassigned and select "Edit". On this page click on "Unassign This Image From This Project".
Unassigning an Image from a Project
On the Image Library page, select "View Unassigned Images".
Viewing Unassigned Images
On this page you can see all of the "loose" images which you have not assigned to a project. (Images MUST be added to a project before you can use it for output in an application, folio, and before a curator can see them when browsing your profile.
To assign an image to a project that is already in your Image Library, simply select the project from the drop down menu to the right of the image. You can do this for as many of the images on the page as you like, and all of them will be assigned accordingly once you click on the "Assign Images" button.
The Unassigned Images Page
Editing the description for a single image can be done by navigating to the image record for the particluar image.
If the image is assigned to a project, click on the "Edit Image Group" link on the Image Library page.
Edit Image Group Link on the Image Library Page
If the image is not assigned to a project, click on "View Unassigned Images" on the Image Library page.
Viewing Unassigned Images
On the far right of the screen, you will see two links; "Edit" and "Delete".
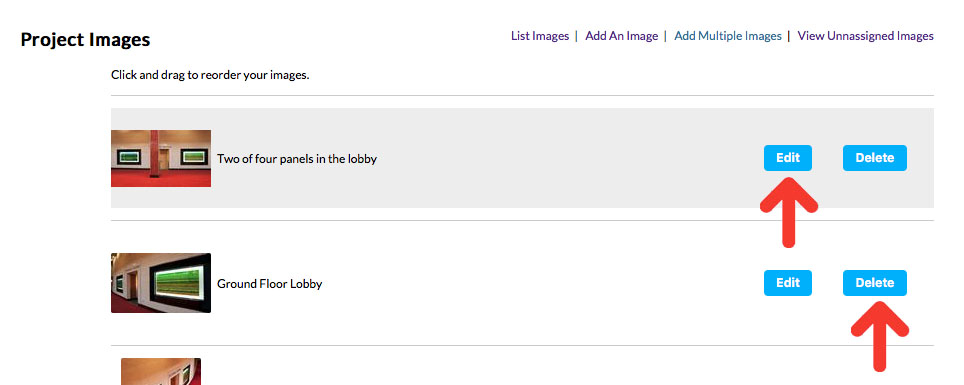
Select "Delete" if you wish to remove this image from your Image Library. (This will erase the image permanently. If you wish to unassign the image from its project please see the instructions above.)
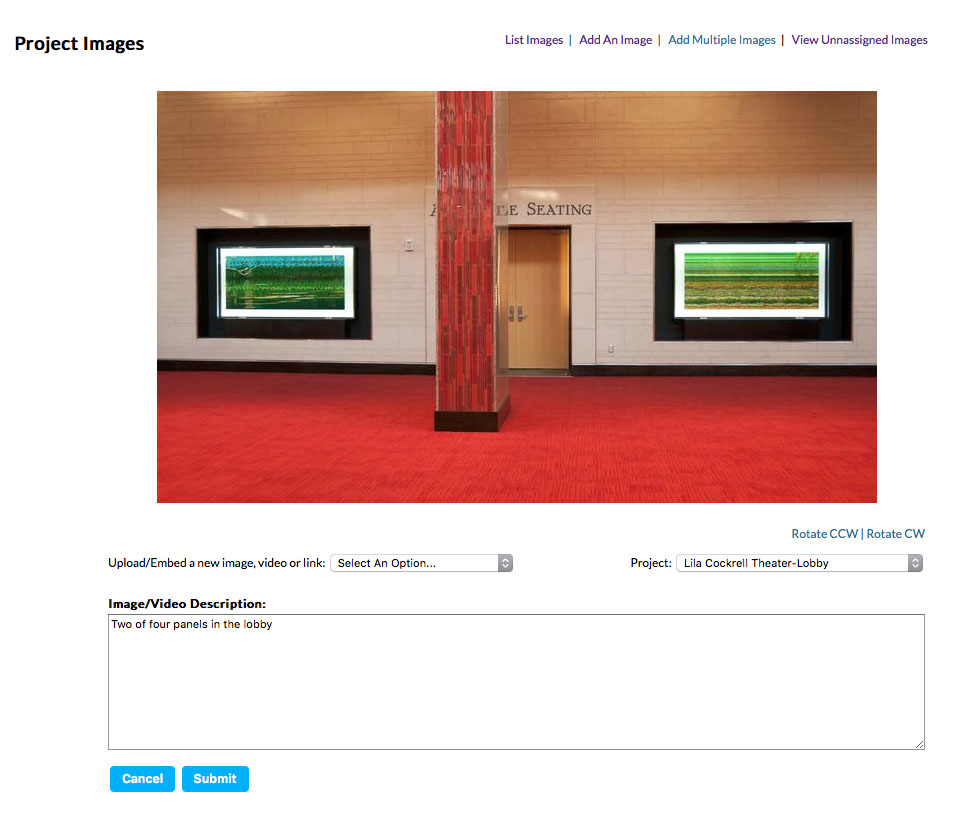
Select "Edit" if you would like to upload a new version of your photograph or if you would like to edit the description for the image. Be sure to save your changes by clicking on the "Submit" button at the bottom of the screen when you are finished.
Editing an Image
Your Documents contains the standard documents required for responding to RFQs. You'll enter some standard text for your Resume, Artist Bio, Artist Statements, and Letter of Interest. For each application you complete, you'll be able to customize the text for that specific RFQ.
When you're ready to fill out this section of the website, choose which document you want to edit by clicking on its link above its description, or by clicking on its link in the left navigation pane. (You can use these links all through the Documents section to jump around; there's no need to go back to the main Documents page to go to a different document.)

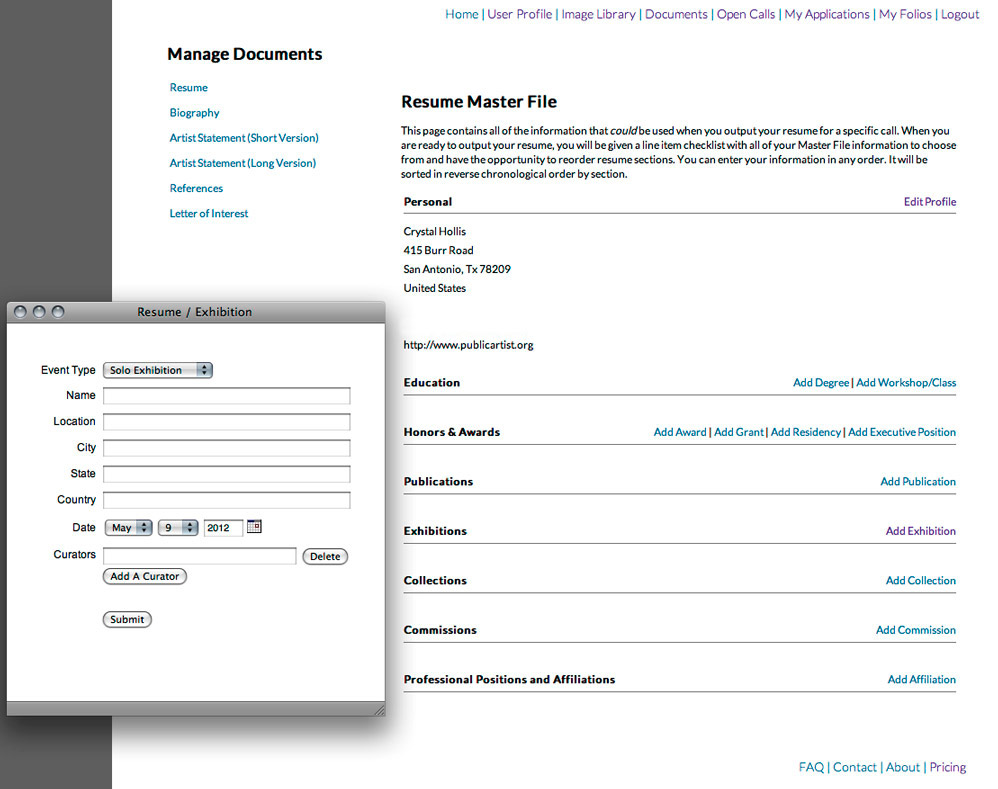
When you're ready to enter your resume, navigate to the Resume by clicking on the link on the Documents page or by clicking "Resume" on the left navigation panel.
Your resume pulls the information in your User Profile as a header for the document, so make sure you've entered your information carefully! If you see any mistakes, you can click on the "Edit Profile" link on the right to edit the information.
Next, click on the type of item you want to enter on your resume. A pop-up window will appear with fields to fill in for that type of entry. Most of the fields are optional. We'll order the information and punctuate it correctly on the output resume, so just make sure your spelling and capitalization are accurate. Once you've entered all of the information you want, click "Submit". This entry will now show up on your Resume Master File page.
Your biography is about your life, where you grew up, how you came into the field of public art, etc.
Simply type or copy and paste your biography into the text area and click "Save Changes" when you're finished.
Your artist statement is about your work, its meaning, your inspiration, etc.
We have given you the opportunity to save a long version and a short version. Simply type or copy and paste your statement into the text area and click "Save Changes" when you're finished.
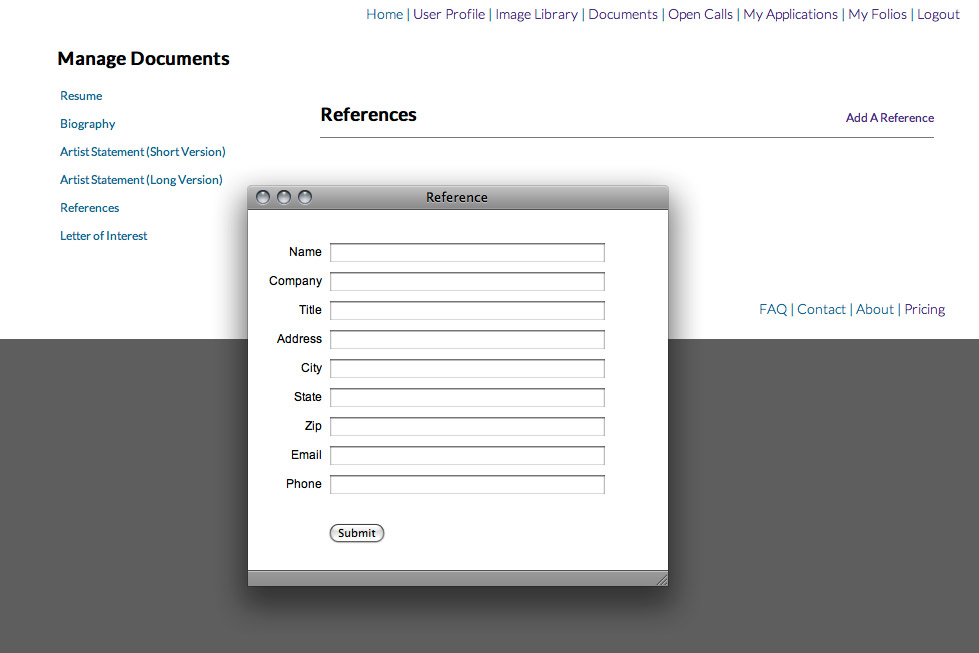
You can keep an "address book" of references for your public art projects on PublicArtist.org.
When you are ready to enter a reference, click "Add A Reference". A pop-up will appear with fields to fill in the information you have for the person. When you have finished entering all of the information you have, click "Submit".
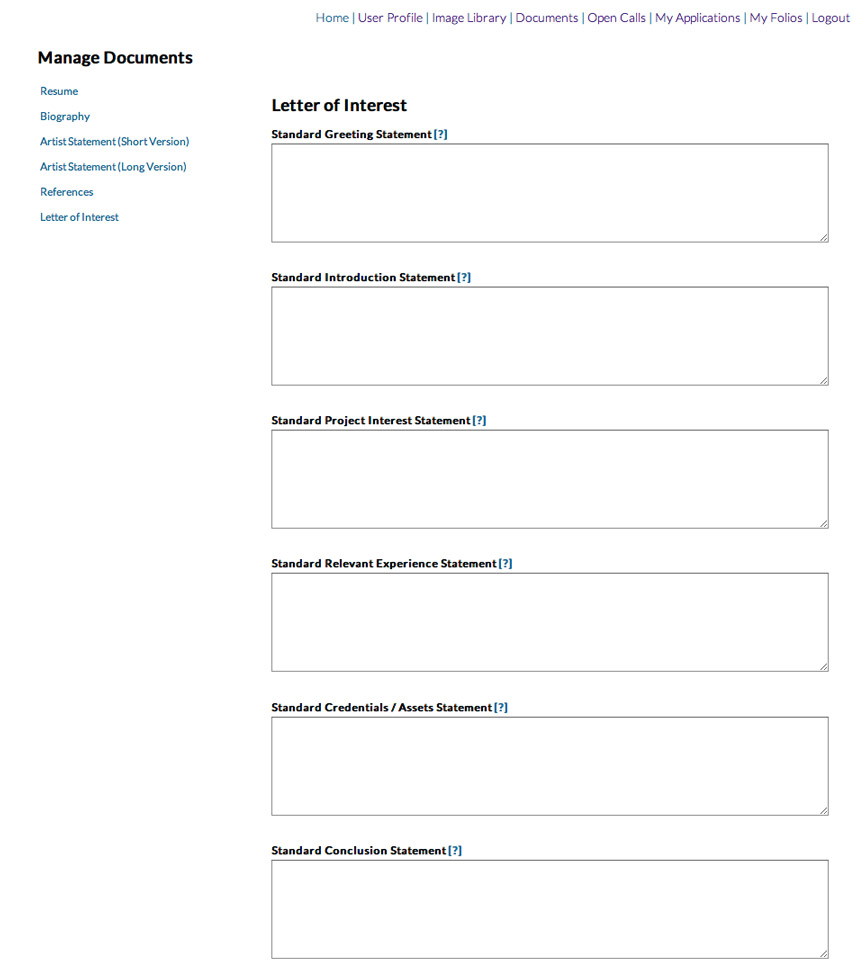
Composing a letter of interest on PublicArtist.org is easy! You can input some standard text, that you may use in a letter of interest, and then when it's time to write a specific letter, you'll get a chance to pick which pieces you want and edit them according to the call you're applying to.
Type or copy and paste your text into the text areas, if you need some tips on what kind of information usually goes in these paragraphs, click on the [?] next to the statement's name for a pop-up with some hints. The first section is for standard paragraphs that would most likely show up in all of your letters.
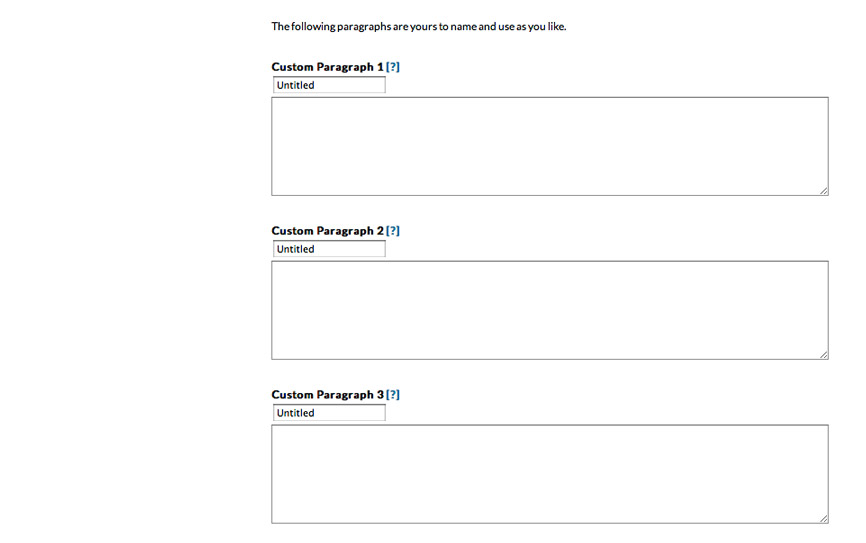
When you've completed filling out those sections, scrolling down the page will take you to a section where you can also enter some custom paragraphs. You may want to enter some text that you use often in your letters of interest, but that doesn't quite fit into any of the other sections above. Be sure to change the title of the Custom Paragraph so that you can recognize it when you're putting your letter together for an application or folio.
Finally, you will probably want to upload an image of your signature. We will add this to the bottom of all of your letters. If you'd prefer to hand-sign printed copies of your letters, you can skip this step.

Once you've entered all of your projects and information to your User Profile, Image Library, and Documents sections, you're ready to start applying to calls.
To see what calls are accepting applications, click on "Open Calls" in the main navigation panel.
The Open Calls Page
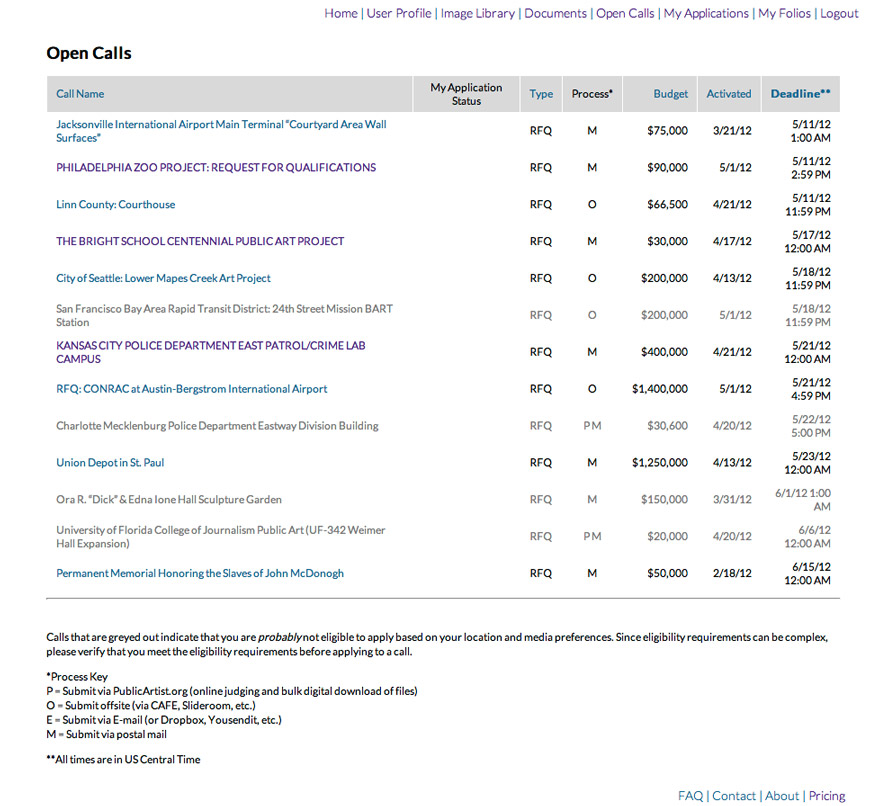
Calls that are shown in blue text are calls that you are probably eligible to apply to. Calls that are shown in purple text are calls that you have looked at already. Calls that are in grey text are calls that you are probably not eligible to apply to.
At a quick glance, you can see the name of a call, what type of application is being asked for, what the method of submission is (Process), the budget, the date it was opened on PublicArtist.org, and when the deadline for submissions is. If a column's title is in blue text, that means you can sort the calls by this field, simply click the title and the page will reload with the calls sorted.
Please see the key at the bottom of the page for explanations on what the abbreviations under Process stand for.
If you see a call that you might be interested in, click on the title. You will be taken to a page that explains the details of the call. If the call is not a call that you can complete on PublicArtist.org you will find a link to the site where applications can be completed. For calls where the application can be completed on PublicArtist.org there will be a link at the very bottom of the page to apply for the call.
***(Keep in mind that for calls which require mail-in submissions, you must download your application materials, and mail them to the call administrator. Simply completing the application on PublicArtist.org WILL NOT suffice.)***
Managing Your Applications
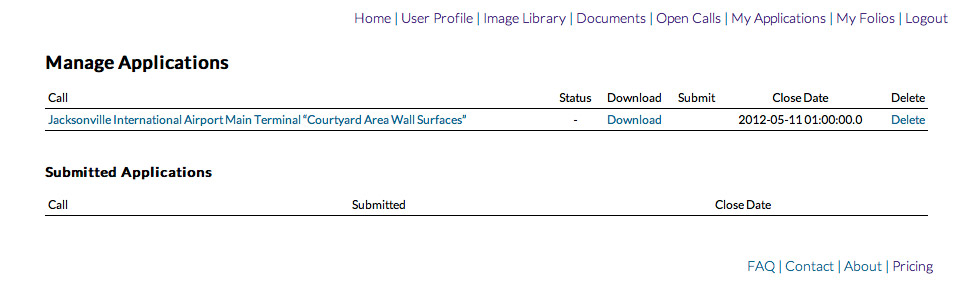
Once you've opened an application on PublicArtist.org, it will show up on your My Applications page. All of the applications you have started and completed will show up here, along with their status, close date, and links to edit, download, submit or delete the application. Clicking on the application title will take you to the area where you can edit the application.
Editing and Completing an Application
On the application page, you will see a brief description of the call, it's open and close dates, and the budget. If you would like to go back and read the entire RFQ, click on "Review Additional Details".
You can complete the application in any order you wish.
The first section of the application process is the Letter of Interest. (Not all applications require a letter.) Click "Compose Your Letter".

After you have clicked on "Compose Your Letter", a pop-up will appear with instructions for composing your letter. Your default paragraphs that you have already entered in the Documents section will appear on the left of the window.
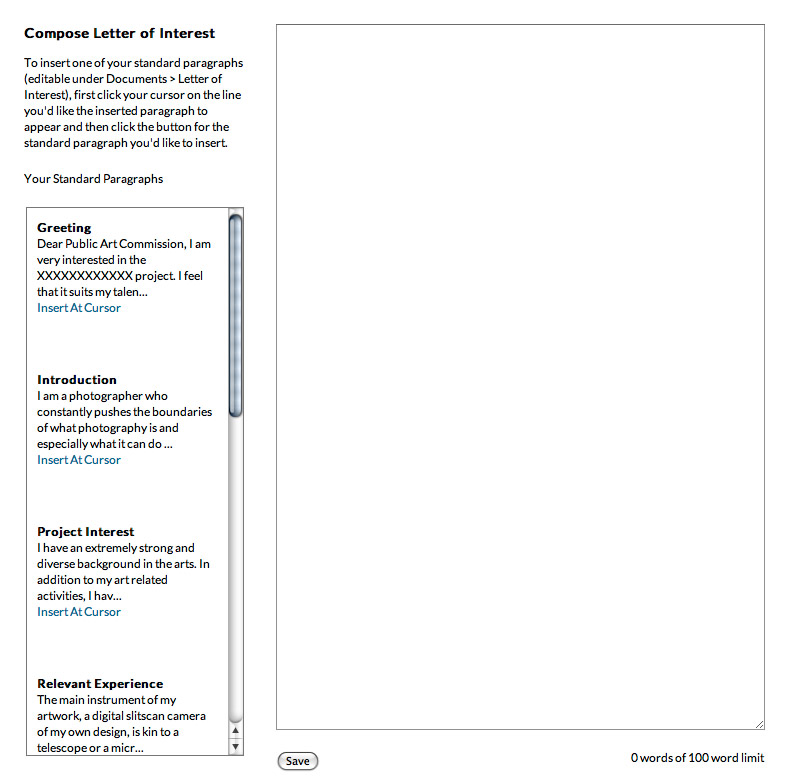
Place your cursor in the large text area on the right, and choose which paragraph you want to insert. Click "Insert At Cursor" to place that paragraph in your letter. You can now edit the text any way you like, without changing what is saved in your Documents section.
***After default text is placed, the cursor remains at the beginning of your pasted text. Please pay attention to your cursor position before inserting additional text.***
Once you have completed writing your letter of interest, click "Save" and the window will close, and you can continue with the other sections of the application.
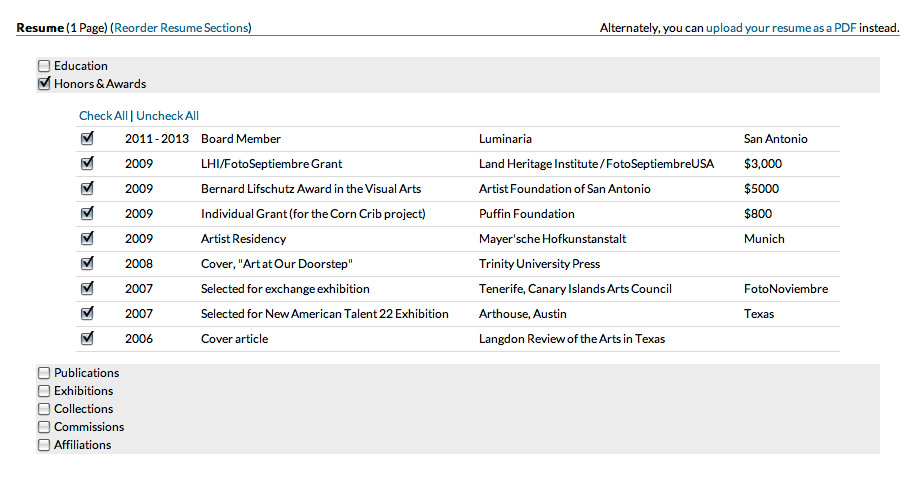
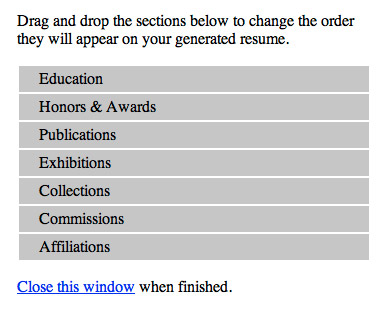
You can also re-order the sections of your resume so that they appear differently when output. To do this, click on "Reorder Resume Sections".
Next you will select the images you want to include in your applications. Begin by selecting the project you want to include pictures of. Then you can select individual images.
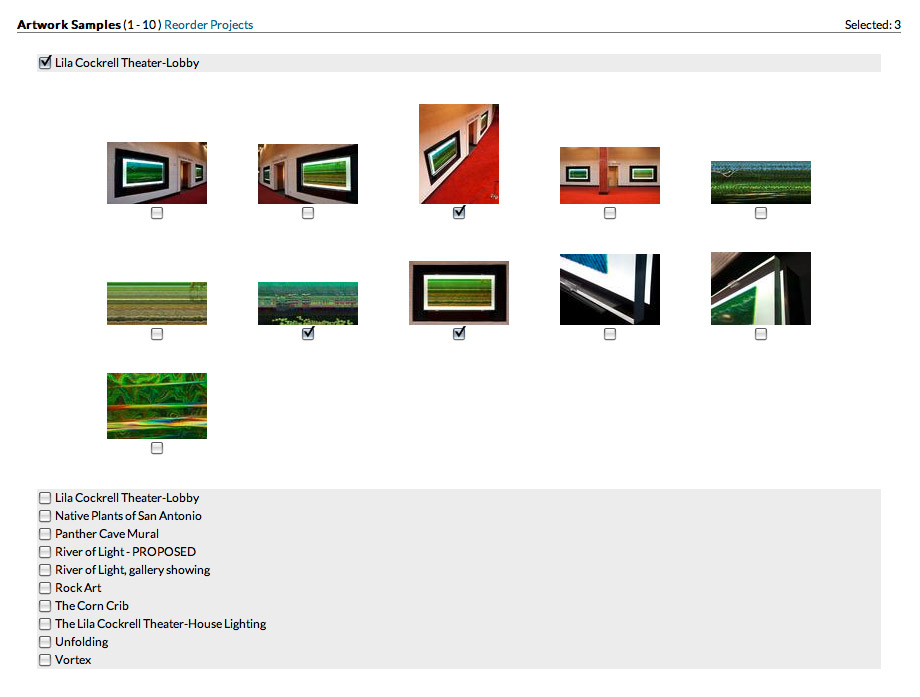
A running count of selected images is shown on the top right of the section. If you have not selected enough images, or if you have selected too many, this number will turn red, as shown below.
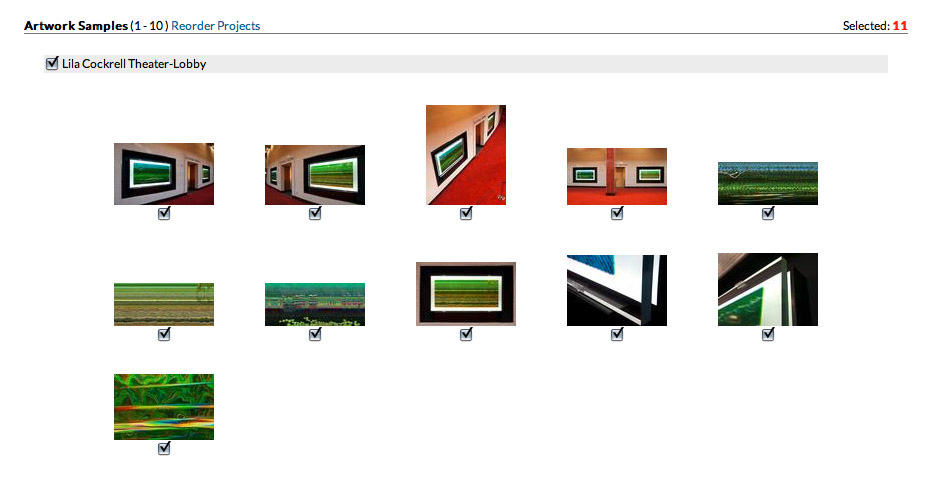
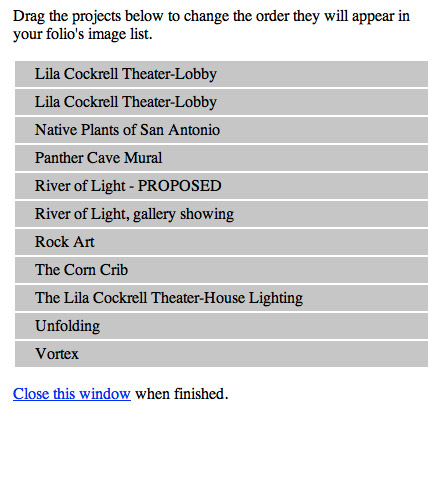
If you'd like to reorder your projects, you can click on "Reorder Projects" and a pop-up will appear where you can drag and drop your project titles into the appropriate order.
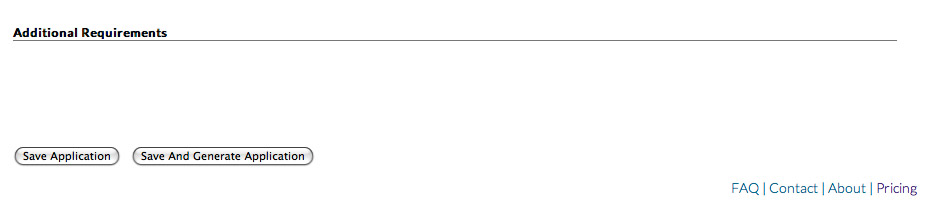
Once you have finished working on your application, click on the "Save Application" button at the bottom of the screen. If the RFQ is a mail in application, you have completed it, and you are ready to download the materials, you can click on "Save and Generate Application". A pop-up will appear and you can download the materials once the file generation is complete.
Folios are packages of your materials made to your specifications. You can create a folio in order to bundle your images, information and documents together for submission to a Call to Artists or RFQ that is not listed on our site. Alternatively, you may need to get a copy of your resume or bio for other professional purposes. Creating a folio is the easiest way to access your information the way you want to see it.
When you're ready to create a new folio, click on My Folios on the main navigation pane.
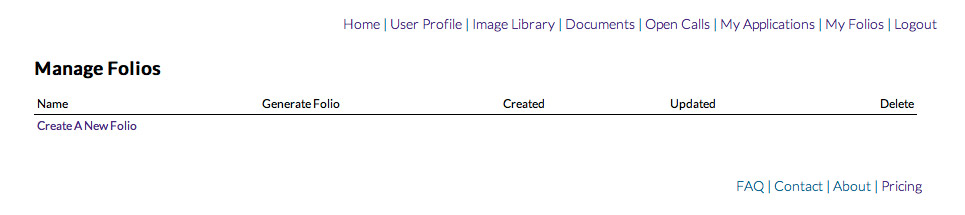
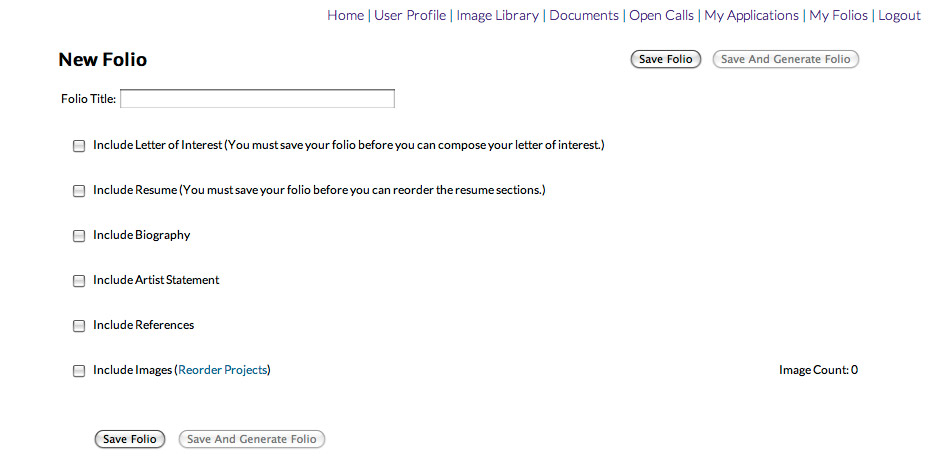
Now, select "Create A New Folio".
On this screen you will name your new folio, and select what items you want to include in the package. Click a checkbox next to the item you'd like to include to show the options available for that item. (You'll notice that you must save your folio before you can compose a letter of interest or reorder resume sections.)
For the letter of interest please see the section above for instructions on how the Letter of Interest Composer works.
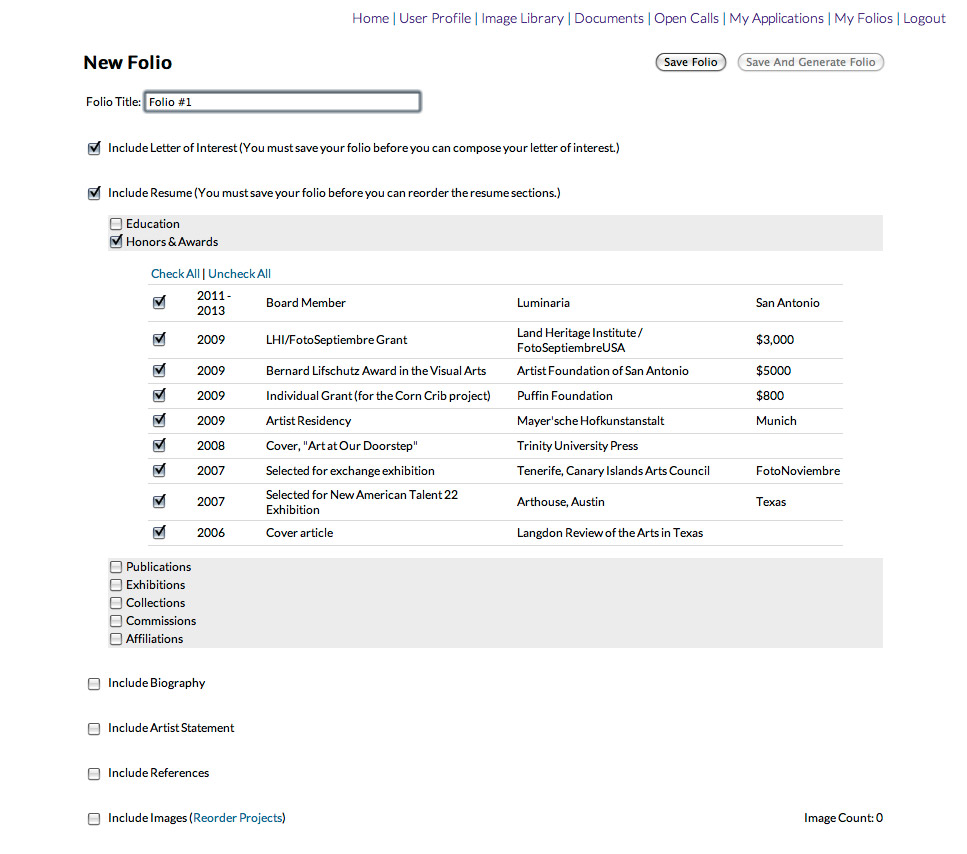
For your resume, you will select sections to include in the resume, and then each item that you'd like to include on the resume.
For your biography and aritst statements you will pre-fill these areas with your default text and edit in the text area where you see fit.
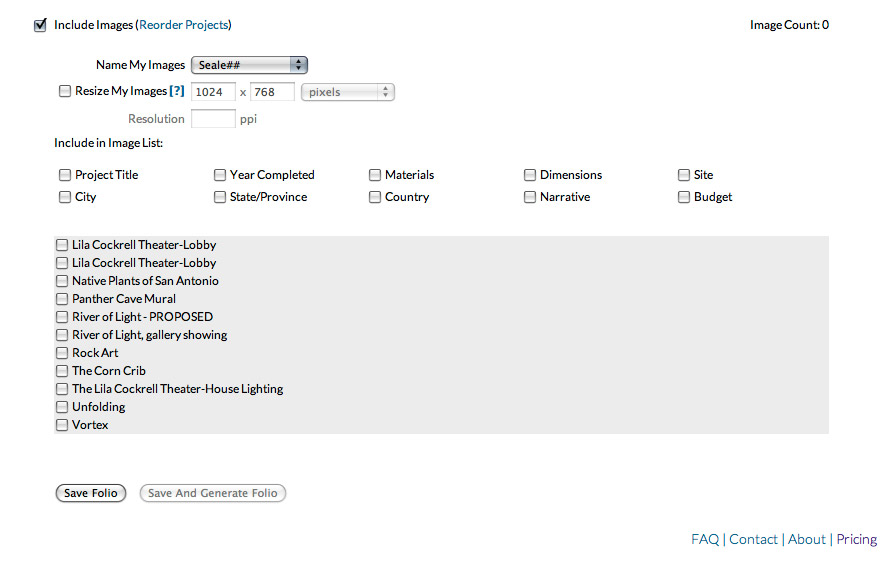
When you get to the Images section of the Folio, you will see a few more options than what are available when completing an application. This is because the administrator entering applications sets the values for these items.
If there is a certain way you'd like to have your images named, select the appropriate option from the drop down menu next to "Name My Images". The # represents a number given to the image for presentation order. If you'd like to reorder your projects you can do so by selecting "Reorder Projects". A pop-up will appear and you can drag and drop the project titles into the order you prefer.
Next you will see an option to resize your images. If you want to include the full resolution photos you uploaded, do not check this box. If you need to resize your images, select the pixel dimensions and leave the drop down menu set to pixels. Alternatively, you can enter a physical size for your images and the resolution needed.
Next, you'll select what fields will be included on the image list generated for your selected images. Finally, choose which projects and images you'd like to include.
When you're done setting up your folio, you can save it.
When you're ready to download it to your computer, select Generate Folio, and download the resulting .zip file. The file will be downloaded into your "Downloads" folder or wherever you have set for downloads to go.